
I always thought "there is no possible way for me to improve my food photography until I invest in an expensive DSLR camera" but nothing could be further from the truth
Tip #1: Learn from the Pros
My first secret weapon? Tasty Food Photography!

After reading the awesome guide, I dared to start using the manual settings of my point-and-shoot camera, learnt tons about composition and setup, and - best of all - I am finally not afraid to edit my pictures in Photoshop (all the different options used to overwhelm me like crazy).
If you are into food photography and are not yet a pro, this guide (ebook) is a must and well worth every penny in my opinion.
Check out my more detailed Tasty Food Photograpy review - here!
After reading it, my pictures even started to get accepted on some of the big food image sharing sites - which results in increased traffic to my site.
When I finally got myself a DSLR (more on that later), I felt overwhelmed with all the new features and needed some clear-cut guidance on how to fully leverage the DSLRs capabilities. So I again was on a hunt to educate myself.
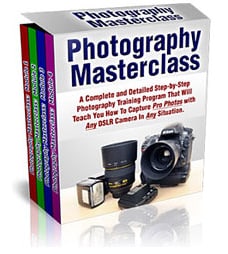
The Photography Masterclass helped me take my photography skills to yet another level. After 2 years of using my DSLR I felt like I had plateaued. I wanted to improve my images and make them even more delicious, but I didn't know how.
This video course is a super helpful guide with in-depth information and easy step-by-step how to's. It is suited to beginners as well as those who have been photographing for a while and are wanting to step up their photos.
Topics covered include lighting, styling, composition, camera angles and editing. It taught me the little things that can make a HUGE difference!
Tip #2: Invest in a DSLR + Lens(es)
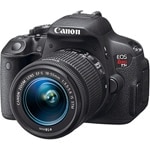
For the longest time, all I used to take my pictures with was a cheap point and shoot digital camera we were given as a wedding gift some years back. It was not a bad little camera - until I broke it - at which point my husband and I decided to take the plunge and finally get my dream camera - the Rebel T5i (known as the Canon EOS 700D in some countries).
It took a bit of getting used to at first, but boy - what a difference. There is so much more depth to my pictures - I smile every time I use it!
Unless you have a budget for it, you don't need a DSLR to start out with - but I will say it makes food photography a whole lot more fun and easier too. My Canon T5i was definitely one of the best investments I have ever made!
NOTE: I wrote a detailed Rebel T5i review - here!
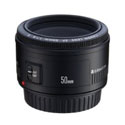
The second best investment for better photos is a great lens. On suggestion of more experienced food bloggers, I skipped the kit lens for the Rebel T5i and got the body-only version. With that I purchased a Canon EF 50mm f/1.8 II lens. This is an affordable macro lens that is perfect for food (or other still) photography. It enables you to take wonderfully crisp close-up shots with awesome bokeh (that blurry background).
I haven't looked back since investing in my DSLR camera (with this lens). Previously - for example - when submitting photos to the big food image sharing sites, maybe 1 out of 6 submitted photos would get accepted. That is a lot of hard work going to waste. So far none of my images - taken with the new camera + lens - have been rejected!
Worth it? Heck yeah! NOTE: I wrote a detailed Best Canon Lens for Food Photography Review!
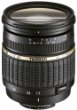
When we went on our first vacation since purchasing the DSLR, I knew I needed a zoom lens as well. This Tamron 17-50mm F/2.8 lens for Canon is a great economical choice for an all-purpose lens. I love to take this lens along everywhere we go. And while being pregnant, it also allowed me to get safe overhead shot. (The Canon 50mm f/1.8 lens usually requires me to climbed on a chair etc. for the same angle).
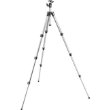
Having a baby doesn't give me the luxury to wait for perfect lighting for my food shots. Using a tripod allows me to still take sharp, bright pictures when there is little natural light coming in from outside (slower shutter speed without camera shake). The tripod also comes in handy for pictures not only of but with my baby!
Tip #3: Stay Organized!
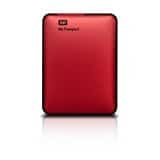
Pictures take up a lot of storage space on a hard drive. To free up this space on a computer or laptop, it is a good idea to use an external hard drive. It's also a great device to store backups of other important files.
Computers are not perfect. They do crash, usually in the most inconvenient situations. Regularly backing up my pictures has saved me a ton of heart and head ache.
The one I have has 1 terabyte of storage space (which is plenty) and is small/light enough to take with me wherever I go.
Bonus Tip:
Use Adobe Creative Cloud to get access to Photoshop, Lightroom and Lightroom Mobile to edit your images. There is no need to buy expensive photo editing software, with Creative Cloud you only pay a reasonable monthly subscription rate of around $10 to get access to all the photo editing tools you need.
Also check out Adobe Stock! With this link you get 10 FREE Adobe stock images.
Common Questions
Yes, there are resources available to enhance your food photography skills. The "Tasty Food Photography" guide and "The Photography Masterclass" video course are highly recommended for learning composition, setup, editing, lighting, styling, and more.
While a DSLR camera can greatly enhance your food photography, it is not necessary to start with one. You can begin with a point-and-shoot camera or even a smartphone and still achieve great results.
However, investing in a DSLR camera like the Canon EOS 700D (Rebel T5i) can provide more depth and versatility to your photos.
Two lenses are commonly recommended for food photography. The Canon EF 50mm f/1.8 II lens is an affordable macro lens that allows for crisp close-up shots with beautiful bokeh.
Another option is the Tamron 17-50mm f/2.8 lens, which is an economical choice for an all-purpose lens with zoom capabilities.
Using a tripod, such as the Manfrotto Tripod, can help capture sharp and bright images even in low light conditions. It reduces camera shake and allows for slower shutter speeds... improving image brightness!
Adobe Creative Cloud is a popular choice for photo editing, offering access to tools like Photoshop, Lightroom, and Lightroom Mobile. With a monthly subscription fee, you can have all the necessary editing tools without the need to purchase expensive software.
Recently I've also been experimenting with the AI tool (Adobe Firefly) that comes with my Adobe subscription and absolutely love it!