
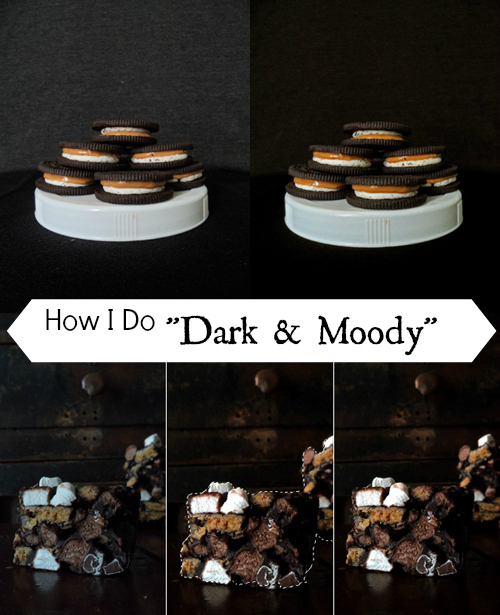
Dark & Moody Photography is a food blogging trend that is here to stay - at least for now. In this post I am going to show you how I take and edit my food pictures to make them dark and moody.
I have never received as many comments on my food photography as when I started posting pictures that could be classified as "dark & moody". Now, I should put out a disclaimer first: I am not the most qualified to talk about food photography. At the moment I am only using a point & shoot camera (hopefully soon a Rebel T5i). So all I am going to do, is show you how I do it, but that doesn't mean it's the only (or even the best way) to do it.
This short how-to guide is intended for bloggers/photographers that are starting out and trying to do their best to take appealing food photography with limited creative abilities and financial resources.

It all started out with these Rocky Road Bars. They where my very first dark & moody pictures and instantly became a HUGE hit.
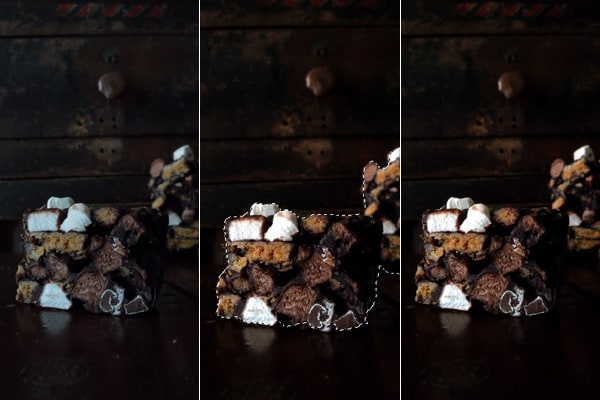
So I started doing more and more dark and moody photography like that and noticed people loved them. More importantly though, people loved sharing them. This was a huge breakthrough moment for me.
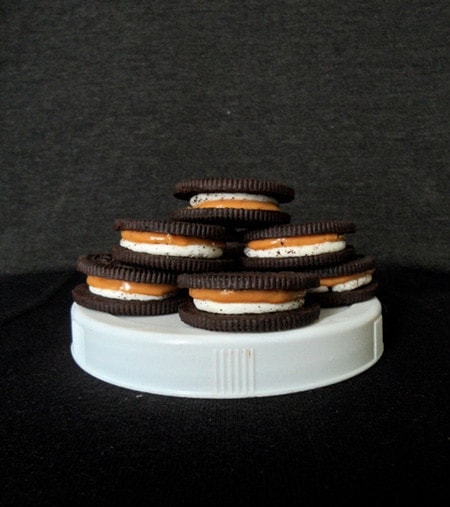
Now the obvious question: How did I go from the SOOC (straight out of camera) picture on the left, to the one on the right (that made it on this blog)?
Before we go into the editing details and steps, let's talk a bit about the...
Set-up and Background
In my post about Changing up your Food Photography I showed you the antique desk that is in the place we are currently renting in Vietnam. This desk serves as a background in most of my darker pictures.
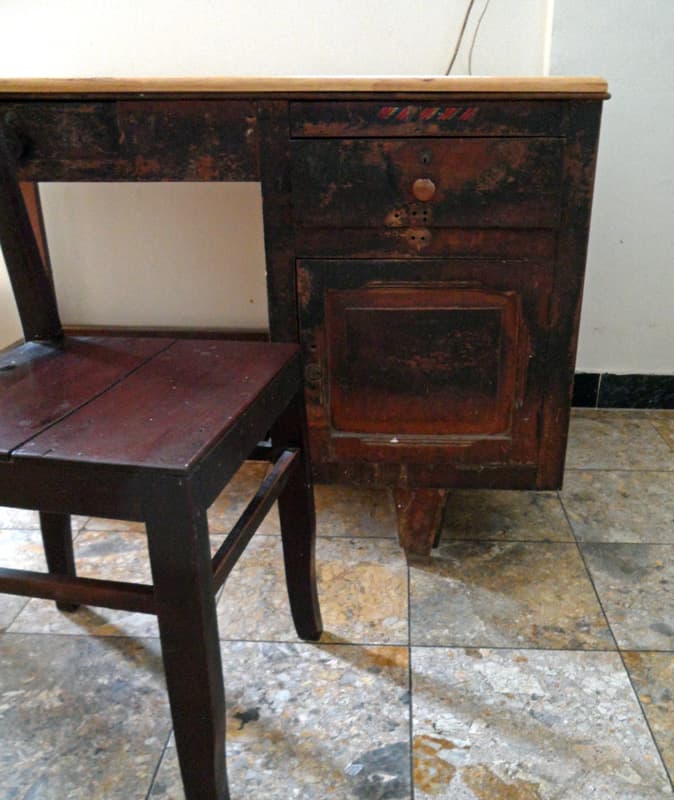
Now, I totally realize that not everyone has an antique desk standing around that they can use as a background. So I did a little experimenting and came up with a setup that everyone can recreate.
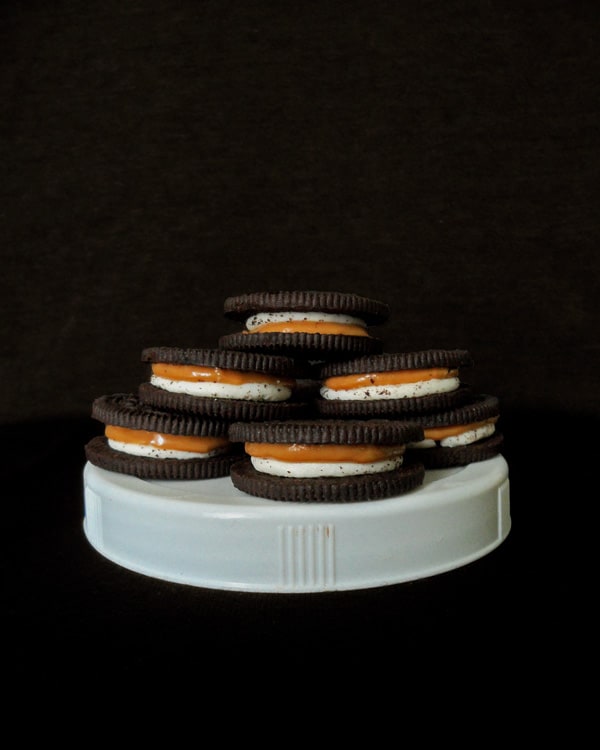
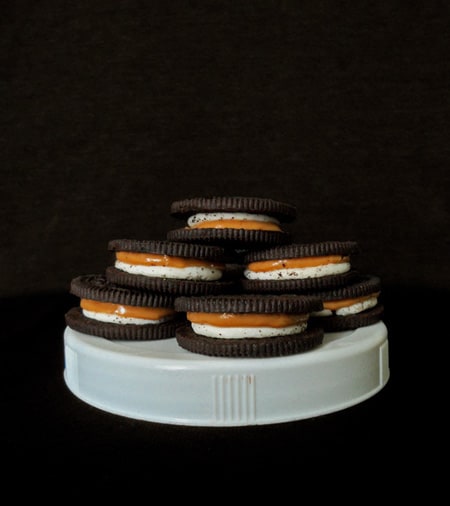
These peanut butter filled Oreos are the component for a treat that is coming up later this week. Do you see the black and dark gray background? They are my black sweater and my husband's gray t-shirt. One is spread on the seat of a chair and the other I hung over the lean.
I bet you all have a chair and dark-colored clothing items.
The next important factor is
Lighting
Although these are "dark and moody" pictures, light is still important. As always - natural lighting is best (at least for me), but I found that too much direct light doesn't work for me to create a moody atmosphere.
Instead, I place the chair in front of an open door so that the light grazes over the setup from one side. In all of my pictures the light is coming from the left. Just play around a little with your setup and I am sure you will find your right spot as well.
Now on to the exciting part:
Editing
Reading the Tasty Food Photography guide revolutionized my photography (I wrote a more detailed Tasty Food Photography review - here). It was after reading that ebook that I finally had the courage to start using Photoshop to edit my pictures.
Before that I was way too overwhelmed with all its functions, so this guide was really great at easing me into it. I have an older version of Photoshop from my husband but it still works great for my needs.
Update: They have updated the guide since I originally went through it, so I recommend it even more now (get it here!).
One thing that really kick-started the darker kind of photography for me, was being introduced to Action Sets by The Pioneer Woman. Action sets are similar to filters you might be familiar with from Instagram or photo editing sites like picmonkey.com
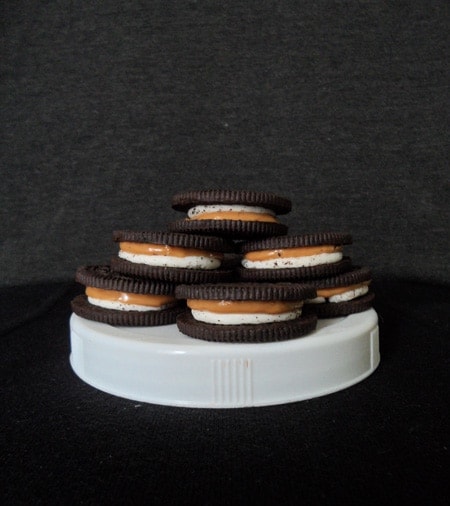
This is the same picture as above SOOC - straight out of the camera. Now let's play with it.
1. First I do a little preliminary adjusting of Levels, Exposure, Brightness/Contrast and I almost always Sharpen the image.
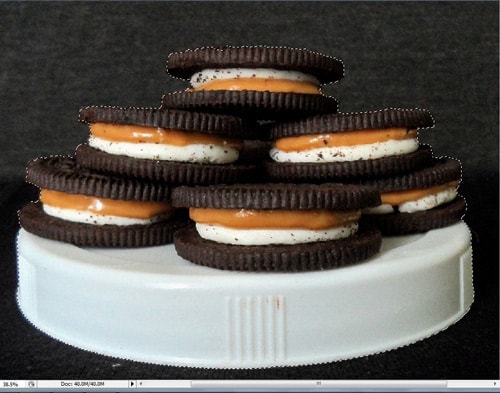
2. You will notice that it usually isn't the food that looks "dark & moody". I only want to apply above mentioned action sets to the background - so I cut out the food. I am zooming in to the food as much as possible and draw around it with the Magnetic Lasso Tool. This is very easy with light food on a dark background but gets a little trickier when the food is dark as well and requires a little more patience.
Then I right-click into the food and select Layer via Cut (sorry, I am not familiar how it works on a Mac). The food and the background are now in 2 separate layers.
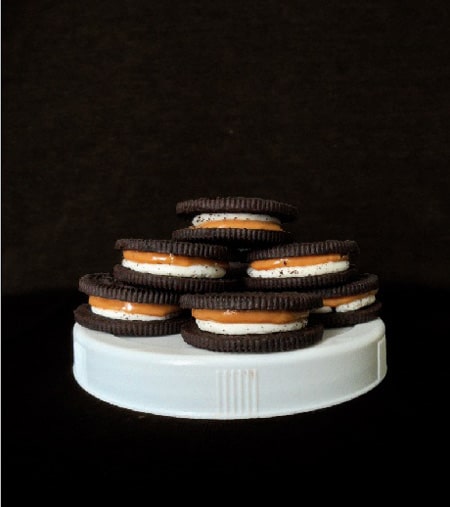
3. I select only the background layer and apply the Old West action set.
4. I decreased the action to about 90% (it was a little too dark) and Flatten the Image.
I also Crop the image to desired size and make a few small adjustments, if necessary. With this one I used the Healing Brush to get rid of a little white spot on the shirt in the background and another one on the foreground.
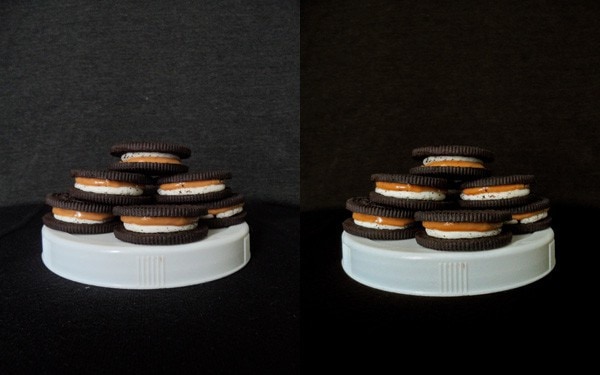
And voila! The difference is most noticeable once the images are side-by-side.
What do you think of this dark & moody food photography trend?
Have you tried taking darker pictures?
Any tips or suggestions that worked for you?
Frequently Asked Questions
"Dark and moody" food photography refers to a style of food photography that creates a dramatic and atmospheric mood by using dark backgrounds, low lighting, and contrasting tones.
If you don't have access to an antique desk or a specific background, you can create your own setup using a chair and dark-colored clothing items. Spread a dark-colored item on the seat of a chair and hang another one over the backrest to create a black or dark gray background.
Lighting is still crucial in dark and moody photography. Natural lighting is preferred, but direct light can be too harsh for creating a moody atmosphere. Experiment with placing your setup in front of an open door or window, allowing the light to graze over the scene from one side.
Adobe Photoshop is a popular editing software for enhancing food photos. After making preliminary adjustments to levels, exposure, brightness/contrast, and sharpening, you can use action sets or filters to achieve the desired effect. Cut out the food from the background using the Magnetic Lasso Tool, apply the action set to the background layer, and make adjustments as needed.
Yes, the "Tasty Food Photography" guide is highly recommended for learning food photography techniques, composition, and editing in Photoshop.
Additionally, The Pioneer Woman offers action sets that can help create the desired dark and moody effect in your photos.
Achieving dark and moody food photography involves setting up a suitable background using dark-colored items and placing the setup in natural light that grazes over the scene from one side. Additionally, employing post-processing techniques with software like Adobe Photoshop can help enhance the desired effect.
To capture dark moody photos, it's essential to control the lighting and create a setup with a dark or black background. Using natural light that is not too direct can help in creating the desired dramatic effect. Additionally, employing editing techniques in post-processing can further enhance the moody look.
While professional cameras and editing software like Adobe Photoshop are often used for dark and moody photography, it's still possible to achieve a similar effect using an iPhone. You can experiment with different lighting conditions and utilize various photo editing apps available on the iPhone to adjust the levels, contrast, and apply filters.
Light and airy photography typically involves bright and well-lit scenes with minimal shadows, evoking a sense of freshness and vibrancy. On the other hand, dark and moody photography utilizes darker backgrounds and lighting to create a dramatic and atmospheric effect, often highlighting contrasting tones and emphasizing the shadows for a more intense visual impact.
Debbie
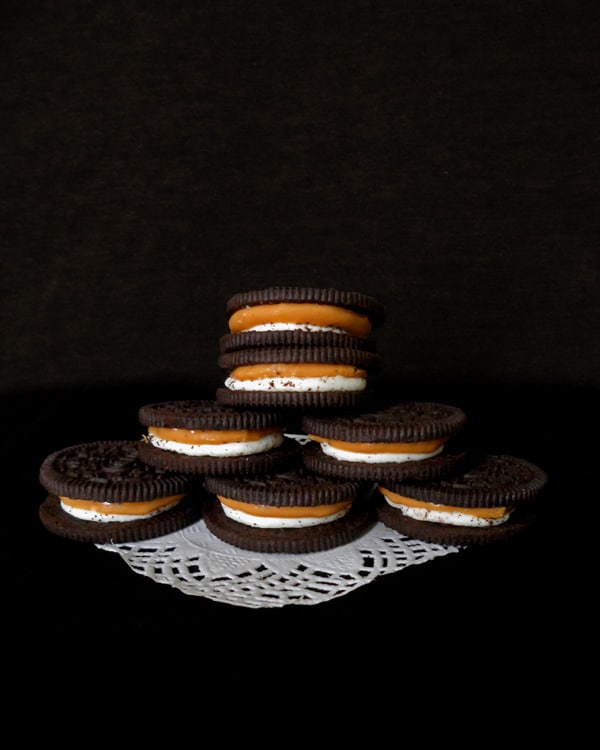
You didn’t mention anything about how you switched the original version from the cake plate to the finished version on a doily.
Regina
This is a different photo I added the same way as above
photography
I love your photographs! Being a photographer I am aware it could be challenging to
find the right shots but they are excellent. I
take advantage of some Lightroom presets to keep
some uniformity throughout my own.
Regina
Thanks for your kind comment Matt.
lisa@cookingwithcurls
I love it! Awesome tutorial, I just wish that I had Photoshop 🙁 Someday
Regina
Thank you very much Lisa 🙂 I totally understand though. If it weren't for the old version my husband still had, I probably also wouldn't have Photoshop right now.
Reba- Not So Perfect Life
Thank you for posting this! I really need to step up my photographs and I'm working on it. I'll def read the book you suggested.
Regina
I am glad you found this helpful, Reba. And I can only recommend the ebook, it helped me a ton 🙂
Tina @ Tina's Chic
I just start food blogging and these are great tips. I can't wait to try them!
Regina
Thats awesome Tina! All the best for your new blog.
Jacquee @ I Sugar Coat It!
Ha! Just did my first dark and moody yesterday!! Wish I'd seen your tips before. I winged it - hope they will translate well in my post. Thanks so much for sharing, Regina!!
Regina
I can't wait to see your version of dark&moody. Can't imagine it looking anything but stunning 😀
Dorothy @ Crazy for Cust
Great tips! I have always been a fan of the dark and moody and never been able to accomplish it!
Regina
Thank you Dorothy. Hopefully this can help you achieve this look 🙂
ashley - baker by nature
Such a great tutorial, girly! Love your dark and moody style.
Regina
Thank you very much, Ashley! 🙂