While a seemingly complex process, making this Rustic Sourdough Bread will provide you with an easy guide to making crusty bread at home. The recipe does take a little time, but the ingredient list is simple and every step is completely manageable for novice bakers and cooks. Dive in to make tasty bread that you can slice and butter before enjoying on its own or as part of a main meal.
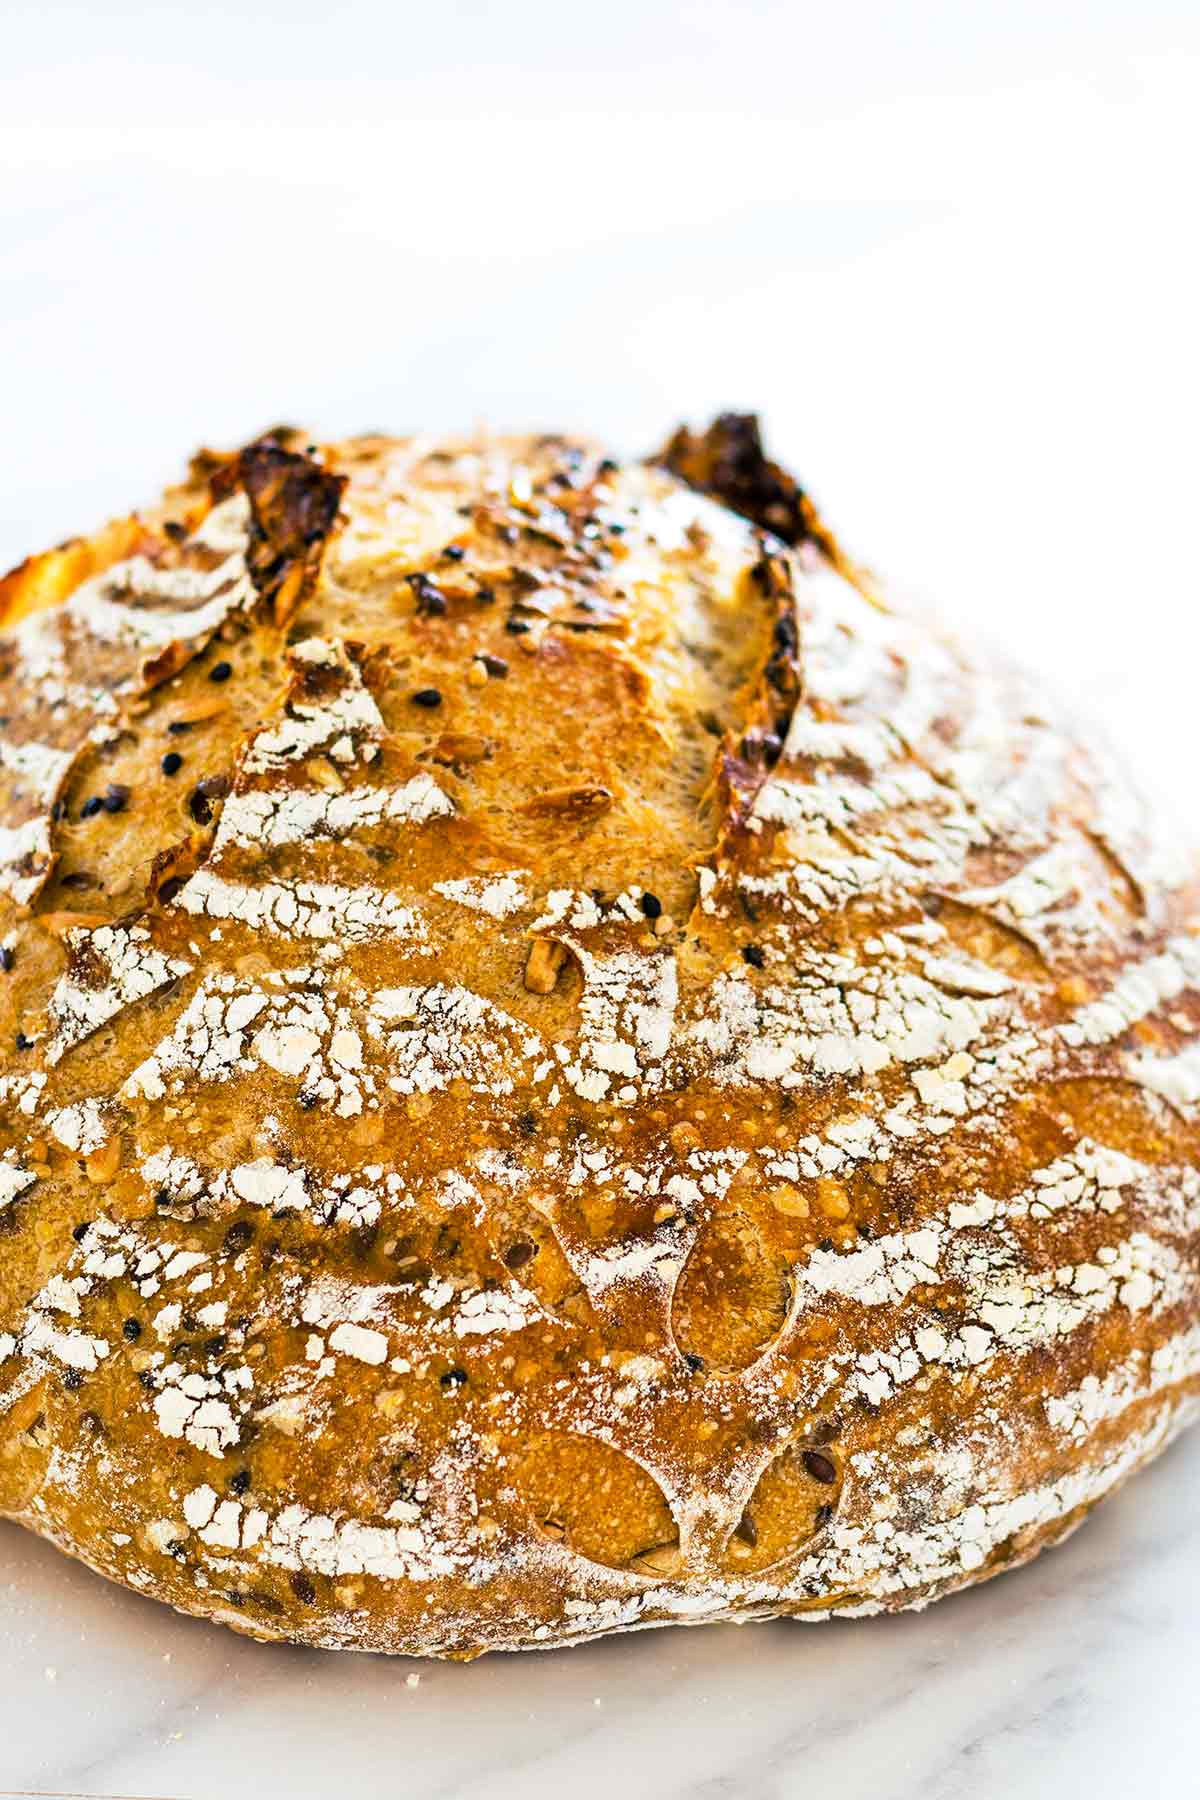
What is Sourdough?
Sourdough refers to a type of bread that you make through a fermentation process. The ingredient list is nice and simple containing only flour, water, salt, and leaven produced from an active sourdough starter. A sourdough starter is a flour and water mixture that contains yeast and lactobacilli bacteria.
Basically, when you make it, you mix flour with water and allow it to sit at room temperature to pick up the yeast and bacteria that is naturally occurring on the grains that make your flour and the environment of your kitchen. The starter requires feedings of water and flour to act as fuel for the yeasts.
If you have any sourdough baking friends, ask them and I am sure they will gladly share some of their starter with you. An older, more established starter is preferable, but if that is not an option for you, I highly recommend following my tutorial for creating a rye sourdough starter. The principle works the same with all-purpose flour, but I find rye starter becomes active faster and is easier to maintain.
How to Know the Starter is Ready to Bake With
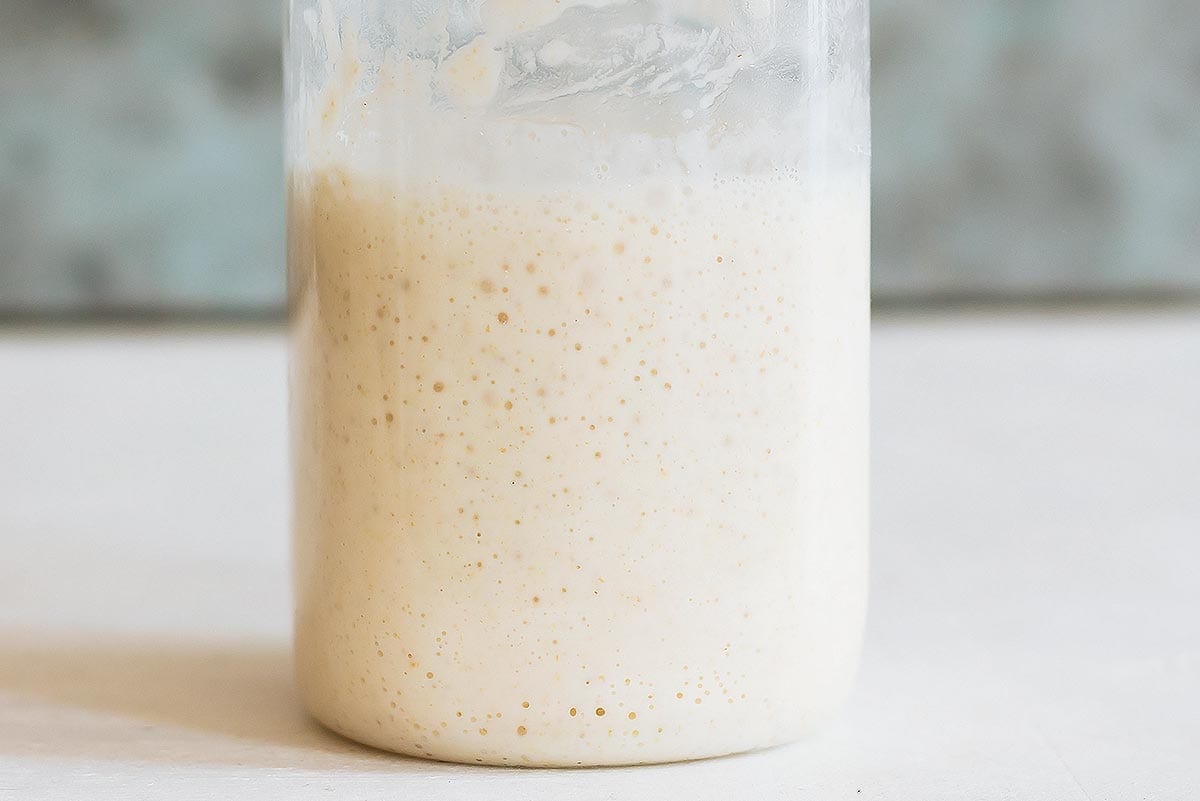
When the starter is active enough to use for baking, it should naturally rise at room temperature. That is how you will know it is ready to bake with. Another good way to test that your sourdough starter is ready to bake with is to place a tiny amount of it in a glass of water. If it floats, it means that it is producing enough gases to raise your bread dough.
Once you are ready to bake, the sourdough starter gets mixed into your bread dough. It replaces the baker's yeast you can buy in the baking aisle of your grocery store and should be enough to get your bread to rise during baking while adding flavour.
How to Make Rustic Sourdough Bread
Making this rustic sourdough bread does take some time. You will have to start making it the night before or approximately 4 to 10 hours prior to when you plan to proceed with making the dough. This is because you need to start by making the leaven, which is a mixture of unbleached flour, filtered water, and your active sourdough starter.
Making the Leaven
To make the leaven, stir together 40 grams of unbleached flour with 40 grams of filtered water and 15 grams of active sourdough starter. Having a digital kitchen scale is very important to ensure accuracy when sourdough baking. Next, cover the leaven mixture loosely with a kitchen towel or paper towel secured with rubber band and set it aside to double.
Making the Sourdough
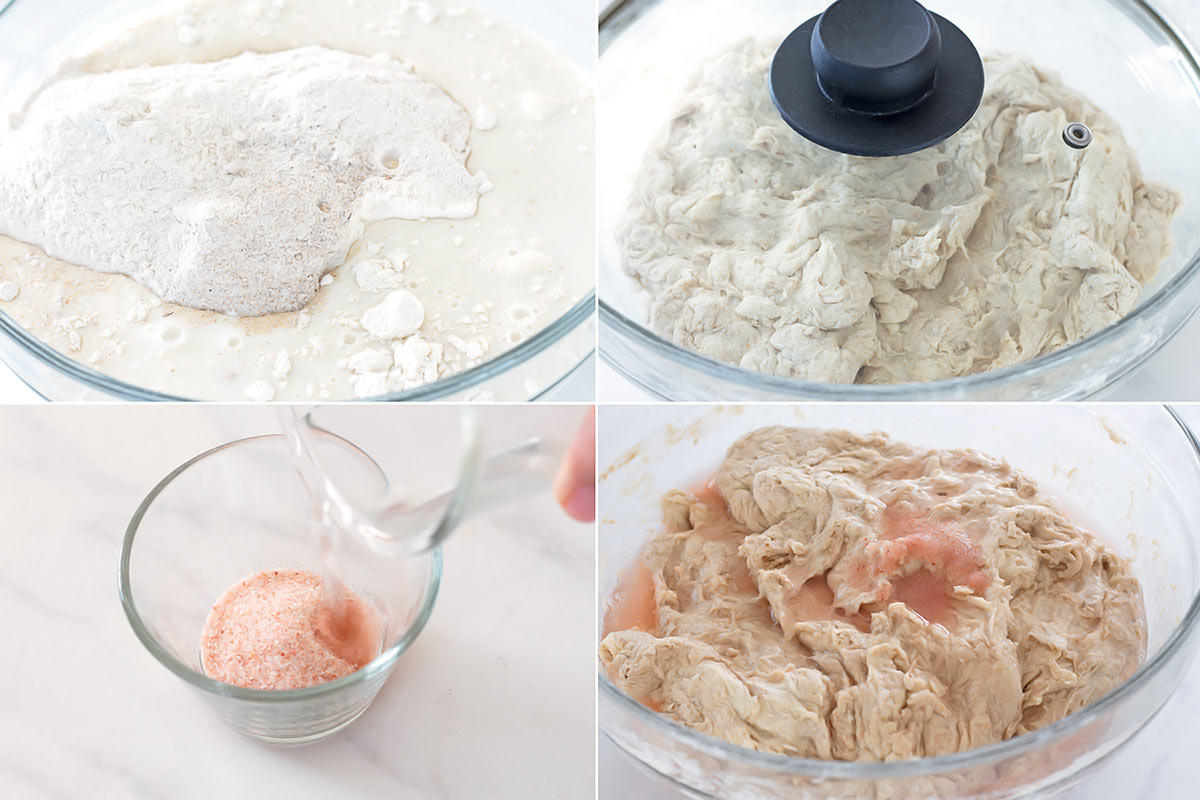
To make the sourdough, you start by mixing the unbleached flour with either rye, whole wheat, or more unbleached flour, along with the water and your prepared leaven. All white flour will work perfectly well in sourdough baking, but the addition of rye flour or whole wheat gives the yeast a little more fuel and adds more complex flavour.
If you have one, you can use a Danish dough whisk to combine the mixture into a shaggy dough. Otherwise use a spatula or just your hands. Then let the dough rest for 40 minutes or up to 2 hours. This process, called the autolyse process, is an important step as it allows for the flour to hydrate fully, helps gluten bonds to develop to reduce the amount of time necessary for kneading, and makes the dough more stretchy than it would be otherwise.
Next, you dissolve the sea salt with hot water. This helps the salt to incorporate with the dough more easily. If you choose to use seeds in your sourdough bread, you can soak them in a cup of water at this point. Another option is to gently toast the seeds in a pan over low heat until fragrant (about 10 minutes). Once the autolyse process has completed for the dough, you can knead the salt mixture into your dough until combined and smooth.
Bulk Fermentation and Stretching the Dough
Bulk fermentation, or primary rise fermentation, is an integral part of bread making. It lasts from the time you have mixed your dough to the time you shape it. This process helps ensure you end up with a flavourful and well-structured loaf.
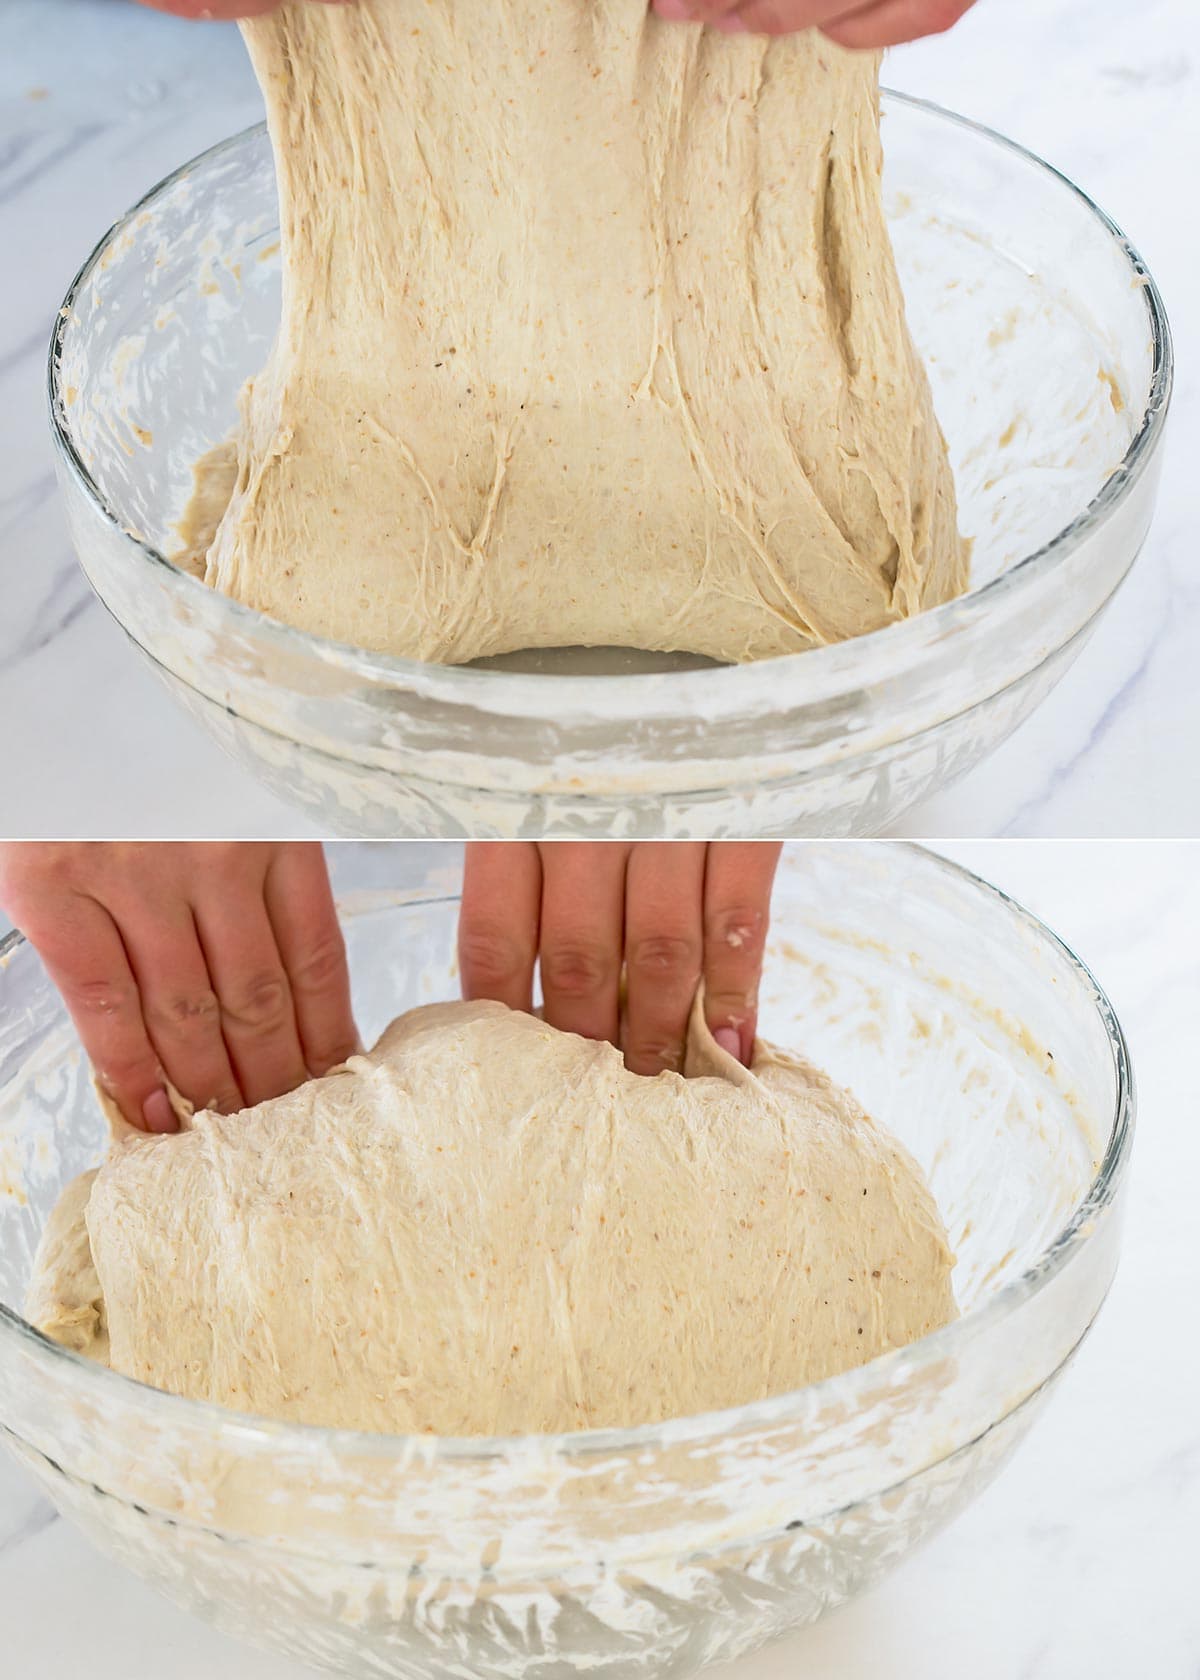
Once you have mixed your dough, you stretch it every 30 minutes for 2 hours. This helps the dough build-up structure. Although you may be tempted to stretch your dough sooner than every 30 minutes, dough tends to tighten up after you handle it, stretching back in on itself. If you let it rest, however, the gluten will relax and you will find it easier to stretch and fold the dough.
Shaping the Rustic Sourdough Bread
For this process, you will need either a floured banneton or a bowl lined with a generously floured kitchen towel. A banneton is a basket you can proof your dough in and can come in several shapes and sizes.
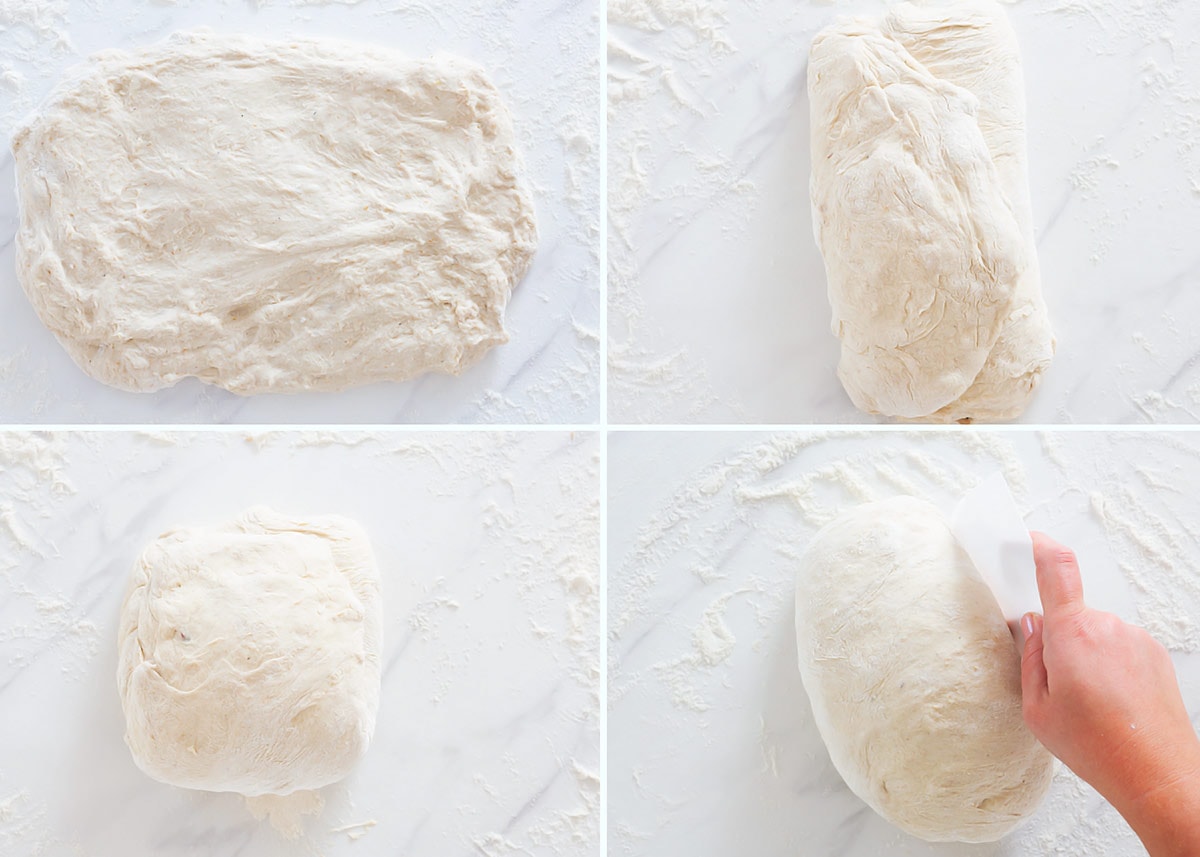
If you chose to include soaked seeds in your bread dough, you can drain them at this point. Next, you stretch your dough into a rectangle on a clean floured surface and spread the seeds on top, if using. Afterward, you fold the top and bottom over one-third of the rectangle and then fold in the sides before pinching them together.
Next, you turn the dough so that the seam-side faces down and turn the dough to tighten up the seam. You can use the help of a dough scraper here to really tighten up and shape the dough ball. After that, the dough goes into your prepared banneton or bowl to rise until doubled in size. The total time for this will be 2 to 4 hours. However, if desired, you can place the dough in the fridge overnight until doubled in size instead. The refrigerator will slow down the fermentation process so that you can wait to bake until the next day. Slower fermentation allows for more flavour development in your bread.
Baking Rustic Sourdough Bread
Once the dough has doubled in size and you are ready to bake, you will want to preheat the oven to 450°F. This may seem high, but it is essential to get a nice golden crust on your bread along with a crunchy exterior. Also, place an oven-safe pot with a lid on the rack when you preheat the oven. A Dutch oven works exceptionally well for this. I have one from Marquette Castings and another from UnoCasa.
Traditionally, with bread baking, a loaf will go into the oven and bakers will either squirt water into it from a spray bottle or place a tray of water on the lower rack to create steam. The steam helps the bread to form a crust. The Dutch oven simplifies the process significantly by granting the bread dough a steamy environment to bake in.

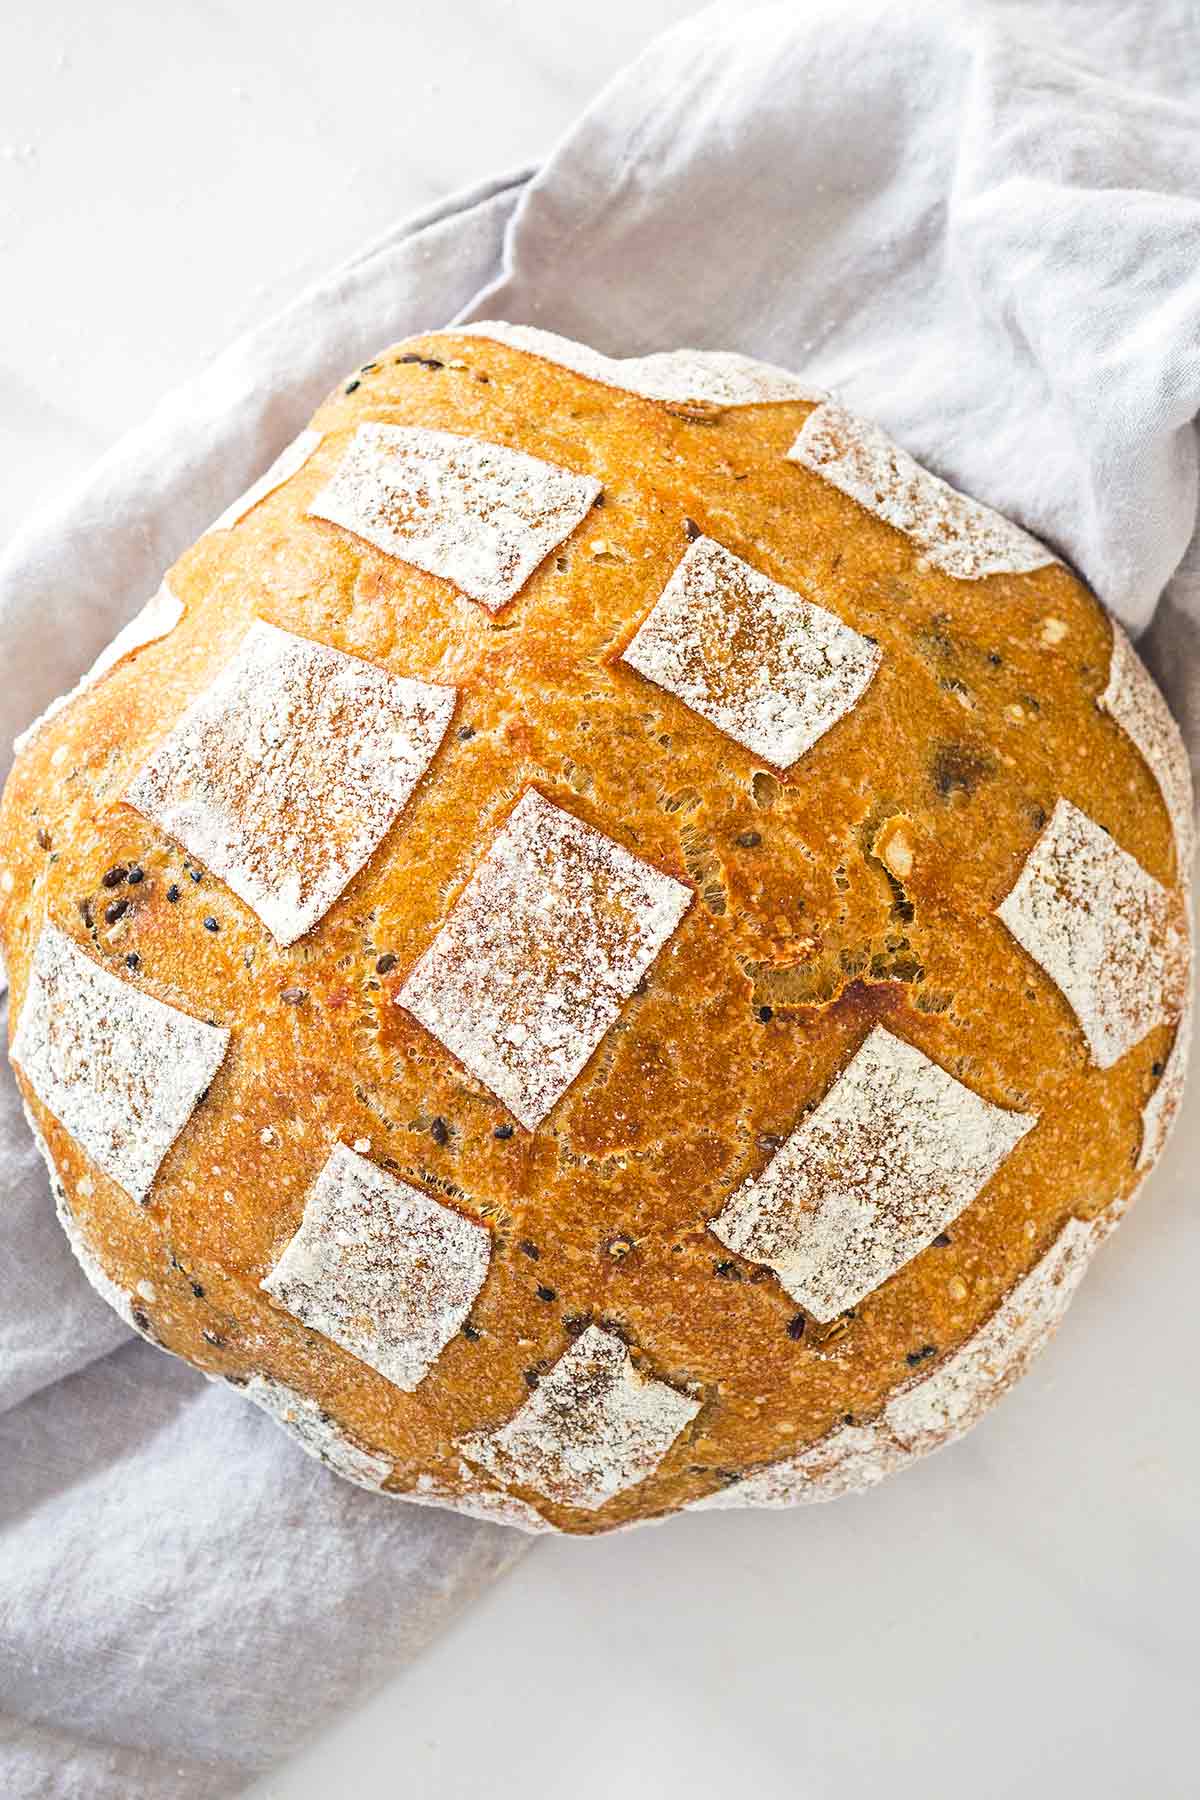
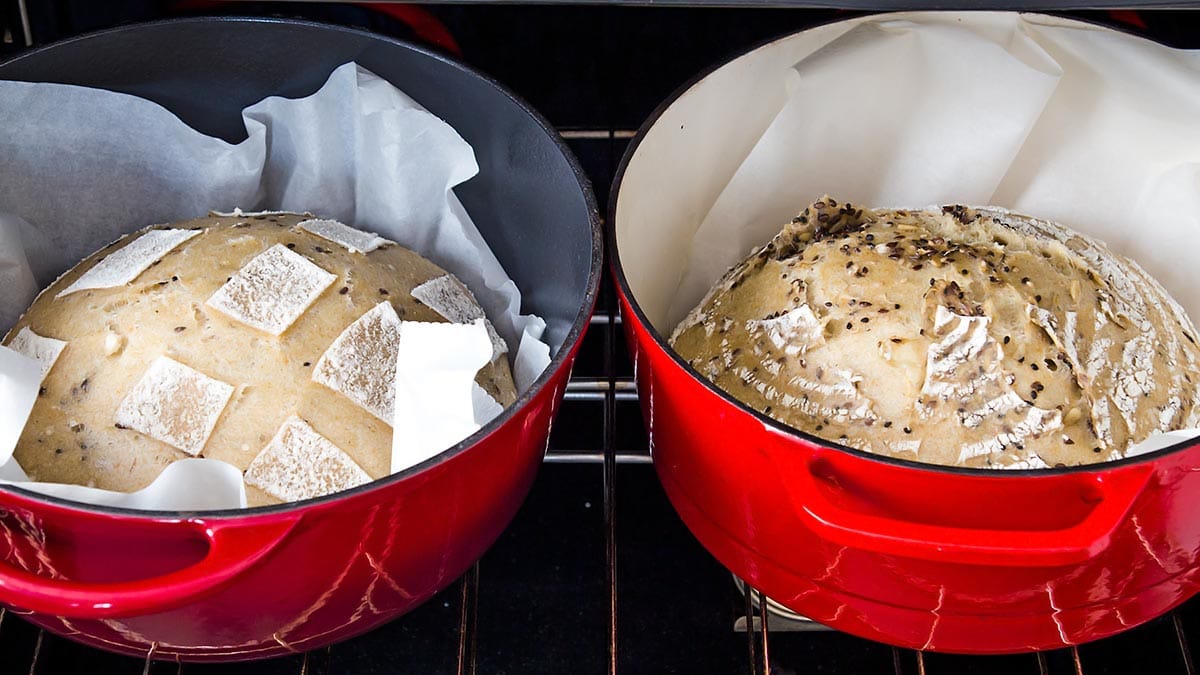
Next, you remove the dough from the proofing basket or bowl and place it on a piece of parchment paper. At this point, it needs to be scored on top with either a lame or a very sharp knife. I use a simple razor blade with one side taped up for safety. The score marks will ensure the dough rises evenly and creates delicious crusty edges that are called 'ears'. You can score a simple half circle along the side or an X on top, or go as intricate as you want with a pattern of your choosing.
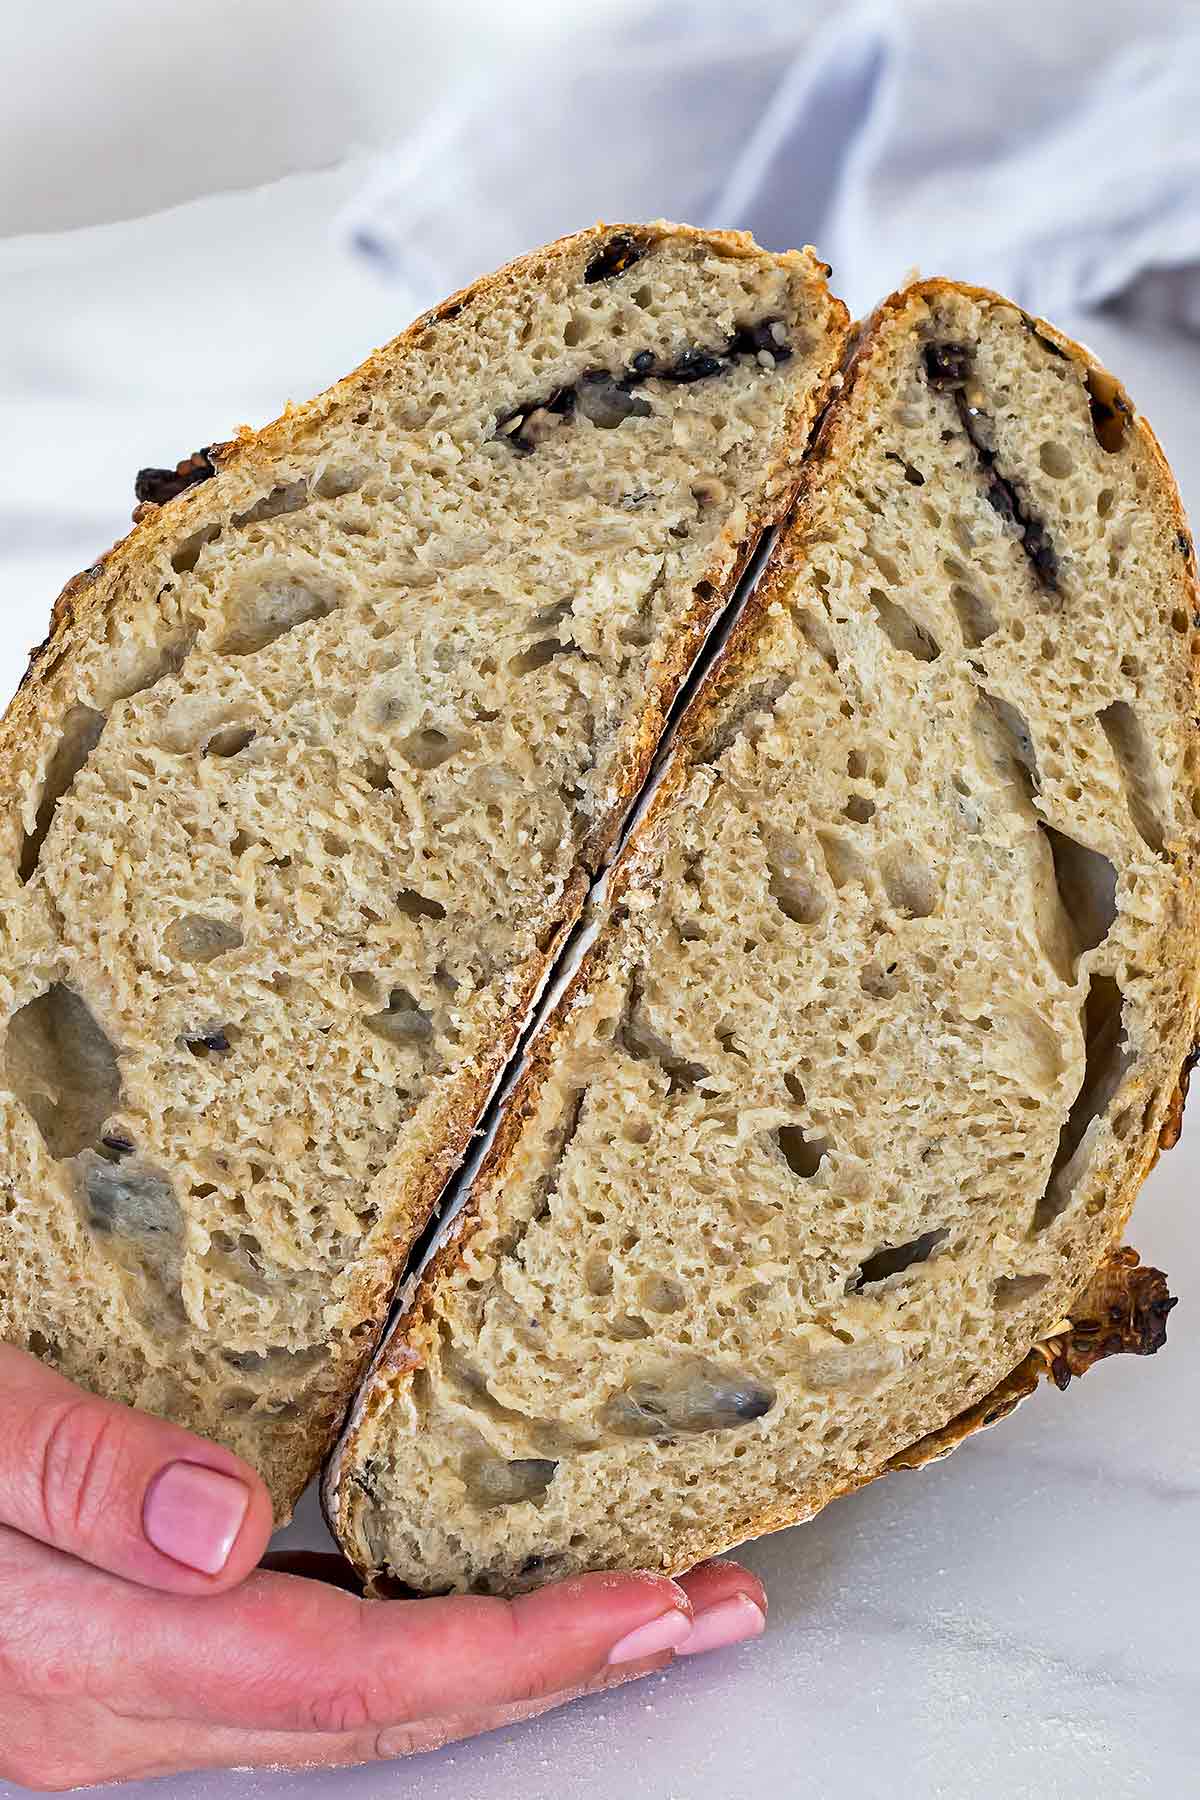
To bake the sourdough loaf, place the bread along with the parchment paper in the hot Dutch oven, cover it, and bake it for 30 minutes. Next, uncover it and bake the bread for another 20 to 30 minutes to become golden brown and become crusty on the outside. It is best to allow the bread to cool before slicing, even though you may be tempted to eat it warm. The inside will be too spongy and you may not get clean slices.
Sample Timeline for Sourdough Baking
This is the timeline I use for sourdough baking. I usually only bake once a week and make 2 loaves at a time then.
(Friday) Night before - 10pm: mix leaven ingredients and let ferment overnight
(Saturday) - 8am: mix flours, water, leaven, cover and let sit 40 mins - 2 hrs. Dissolve salt in hot water. Soak seeds if using.
10 am: add salt water mix to dough and knead in
10:30am, 11, 11:30, 12pm: stretch & fold the dough
2pm: shape the dough into boule
4-6pm: bake, if final rise is at room temperature
(Sunday) 8am: bake, if final rise was in fridge
How to Store Rustic Sourdough Bread
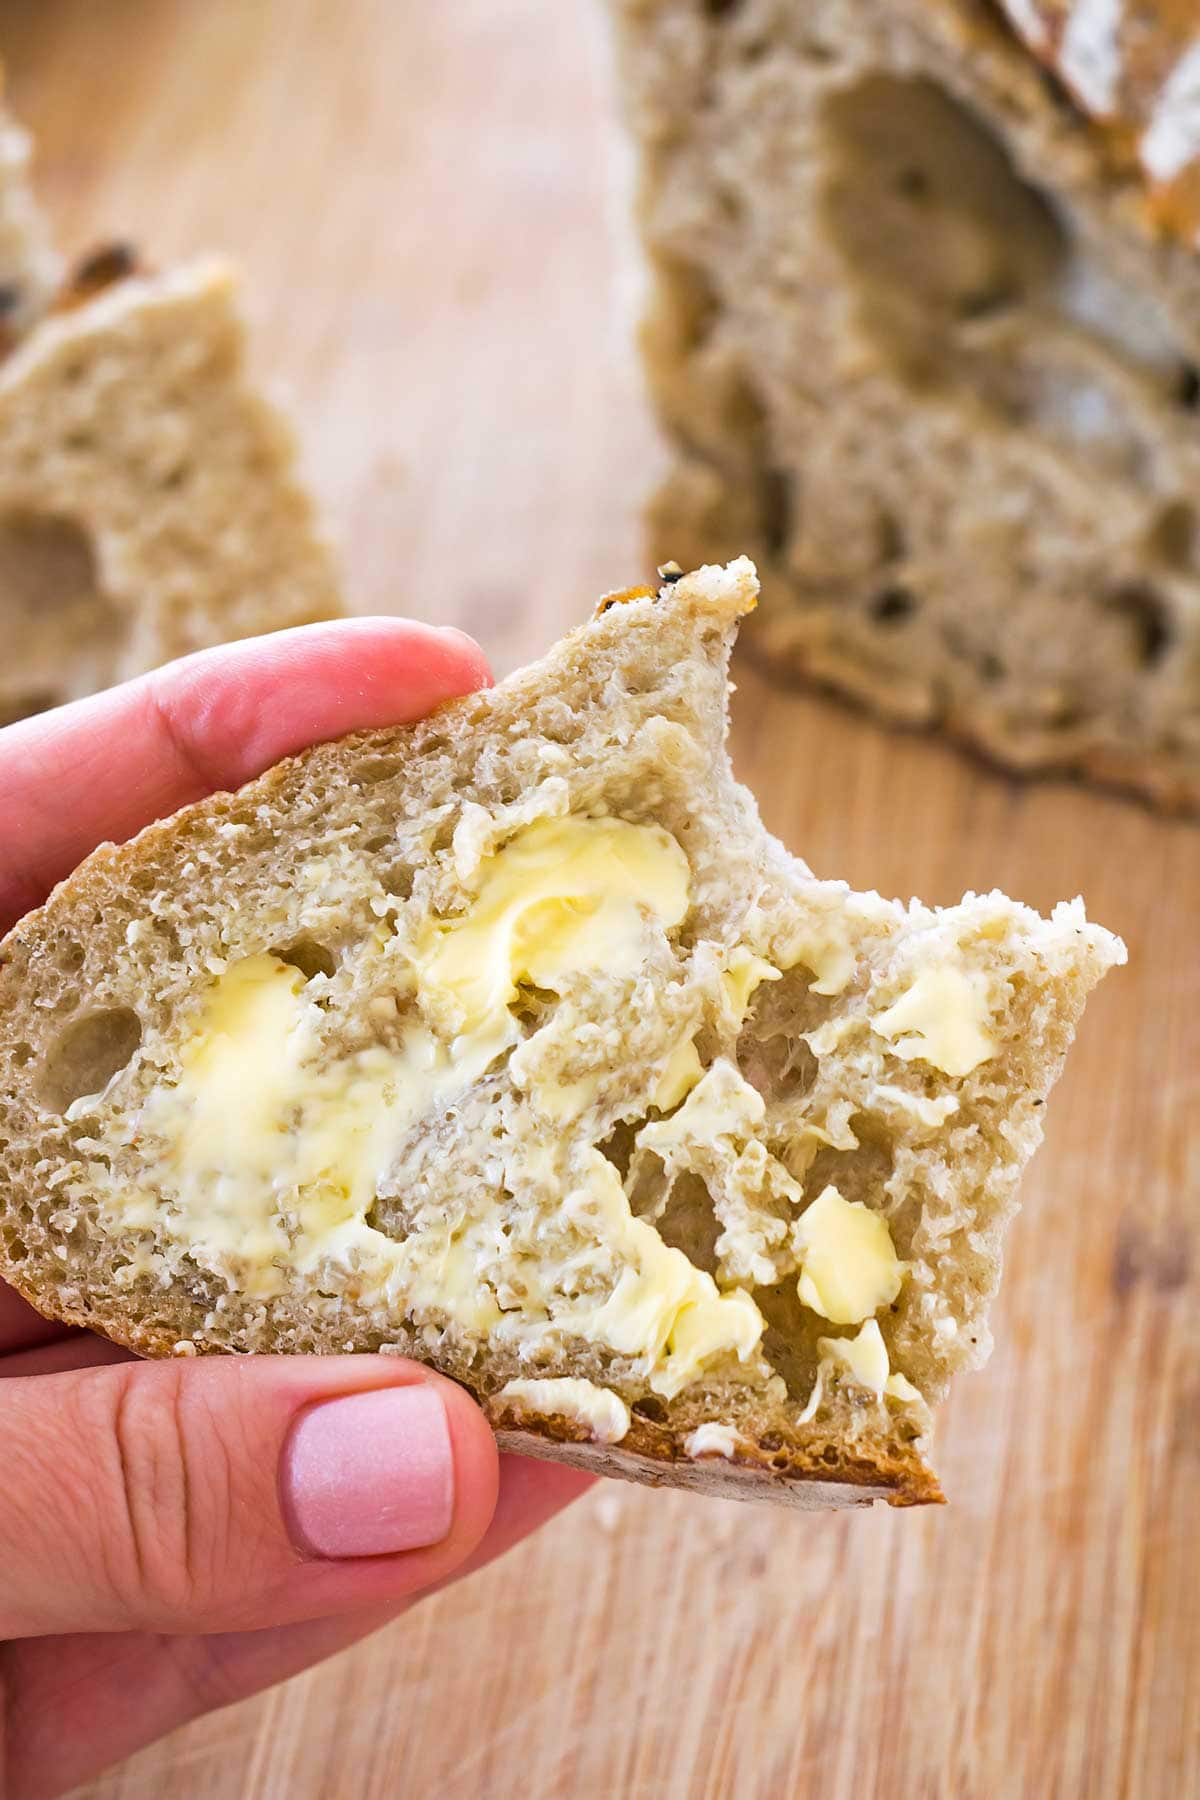
Fresh homemade bread is best enjoyed in the first day or two after baking. It doesn't have the preservatives of store-bought bread and dries out quickly, so it is important to eat it as quickly as possible. I like to cover the golden brown sourdough loaf with a kitchen towel so that it retains its crunchy crust during those initial two days. However, if the bread is kept for longer, you should store it in an airtight container.
For longer storage, I slice the entire bread and freeze it airtight. Then I take out a few slices at a time and thaw in the toaster. This will give the slices a nice crunch again.
If your loaf of bread happens to dry out before you have a chance to eat all of it, don't let it go to waste. It will work extremely well baked with seasonings for croutons or blended into breadcrumbs. Alternatively, you can slice it into very thin slices to bake like crostini.
Other Bread Recipes You'll Love:
Rustic Sourdough Bread Recipe
Ingredients
Leaven (night before)
- 40 grams unbleached flour
- 40 grams filtered water
- 15 grams sourdough starter I like rye starter
Bread Dough
- 400 grams unbleached flour
- 100 grams rye flour whole wheat or more unbleached flour
- 300-400 grams filtered water **
- 80 grams leaven from above or active, fed sourdough starter
- 11 grams sea salt
- 25 grams hot water
- 40 grams seeds (like flax, sesame, sunflower etc.) optional
Instructions
Leaven
- The night before (4-10 hours) starting on your sourdough, stir together 40 grams of unbleached flour and 40 grams of filtered water with 15 grams of sourdough starter in a jar. Cover loosely and set aside to double.
Sourdough
- In a large bowl stir together 500 grams of flour (part rye or whole wheat if you like) with 300-400 grams of water and the leaven from the night before (about 80 g).
- Stir these together until a shaggy dough forms. Cover the bowl (use a large glass lid, a moist towel or plastic bag) and let the dough rest for 40 minutes - 2 hours. This is called the autolyse process.
- At this point dissolve the salt in 25 grams of hot water. If you are using seeds, add them to a cup of water to soak.
- After the autolyse, work the salt water mix into the dough with your hands.
- Now the bulk fermentation starts. During the next 2 hours stretch and fold the dough every 30 minutes. Start from the top edge of the bowl, grab the dough and pull it up, then fold it back into the bowl. Repeat the stretch and fold from the right, bottom, and left side of the dough. Cover the bowl and let the dough rest between stretches.
- After stretching and folding the dough 4 times, cover the bowl and let it rest for 2 more hours.
Shaping
- If using seeds, drain them now. Lightly dust your work area with flour. Prepare a banneton by flouring it. Or generously cover a towel in (rice) flour and place it in a medium-small bowl. Linen or microfiber cloths work best.
- Turn out the dough onto the counter. Stretch it out gently to form a rectangle. Spread the seeds over the surface, if using. Fold the dough in one-third from the top and bottom. Then fold in half from the sides and pinch the seams closed.
- Turn the dough over with the seam side down. Using your hand or a bench scraper, roll the from side to side to create a taut, firm surface. Turn in a circular motion to tie up the bottom seam. Move the shaped dough to the banneton or lined bowl and cover.
- For the final rise, the dough should about double in size, which can take another 2-4 hours. Or do a retarded rise in the fridge overnight.
Baking
- When getting ready to bake your sourdough, place an oven-safe pot with a lid (like a Dutch oven) in your oven and preheat to 450°F.
- Place the sourdough on a large piece of parchment paper. Score the top with a lame or sharp knife. A simple slit works, but you can also do any creative pattern.
- Remove the Dutch oven and place the sourdough including parchment paper inside. Close the lid and return to oven. Bake for 20 minutes. Then remove the lid and continue baking uncovered for another 25-30 minutes.
- After baking, let the sourdough bread cool on a wire rack until completely cooled before slicing.
- Sourdough is best enjoyed fresh within 1-2 days. In that time I cover it with only a kitchen towel to keep the crust crunchy. To store longer, slice the loaf and keep the slices in an airtight container to keep from drying out. Toast the slices to give them some crunch again.
Notes
Nutrition
Pin for later?
Random Questions
Yes, rustic sourdough bread can be a healthy choice. It's fermented, making it easier to digest, and the simple ingredients contribute to a nutritious option.
Rustic bread typically refers to bread made in a traditional or plain style, often with a hearty appearance, like the crusty and artisanal qualities of sourdough.
Sourdough bread offers health benefits due to fermentation, aiding digestion and nutrient absorption. It can be a healthier choice compared to some commercial breads.
While both are often crusty and handmade, "artisan" suggests a crafted, traditional approach. "Sourdough" simply refers to the bread's leavening method using a natural starter.


Leave a Reply